

I've been a photographer and educator for over 6 years now and have taught thousands of photographers all over the world to find their voice, gain confidence in their work and discover a truly unique photography style all their own.
You already have the tools you need to create breathtaking work. I will guide you the rest of the way to make sure you connect your heart to your eye and produce the work you feel inside.
I'm Twyla Jones.

")
Complete Lightroom editing and workflow
Embracing the Storm
Enroll now!
")
Emotional Storytelling
The Podcast
Listen Now

Editing Skin Tones using RGB Numbers
One of the most common issues we hear people having is when they’re trying to either use a preset, or photographed a situation in tricky lighting is that they just can’t get the skin tones right. I’m sure you have been in there in the past, the skin tone is either too green, too yellow, too grey etc etc. You probably get frustrated and change the preset to a different one and the same thing happens. A preset isn’t magic… it doesn’t know what in the photo is grass, trees or water so it obviously changes the entire image including the skin which we want to look like the creamy beautiful skin that it is!
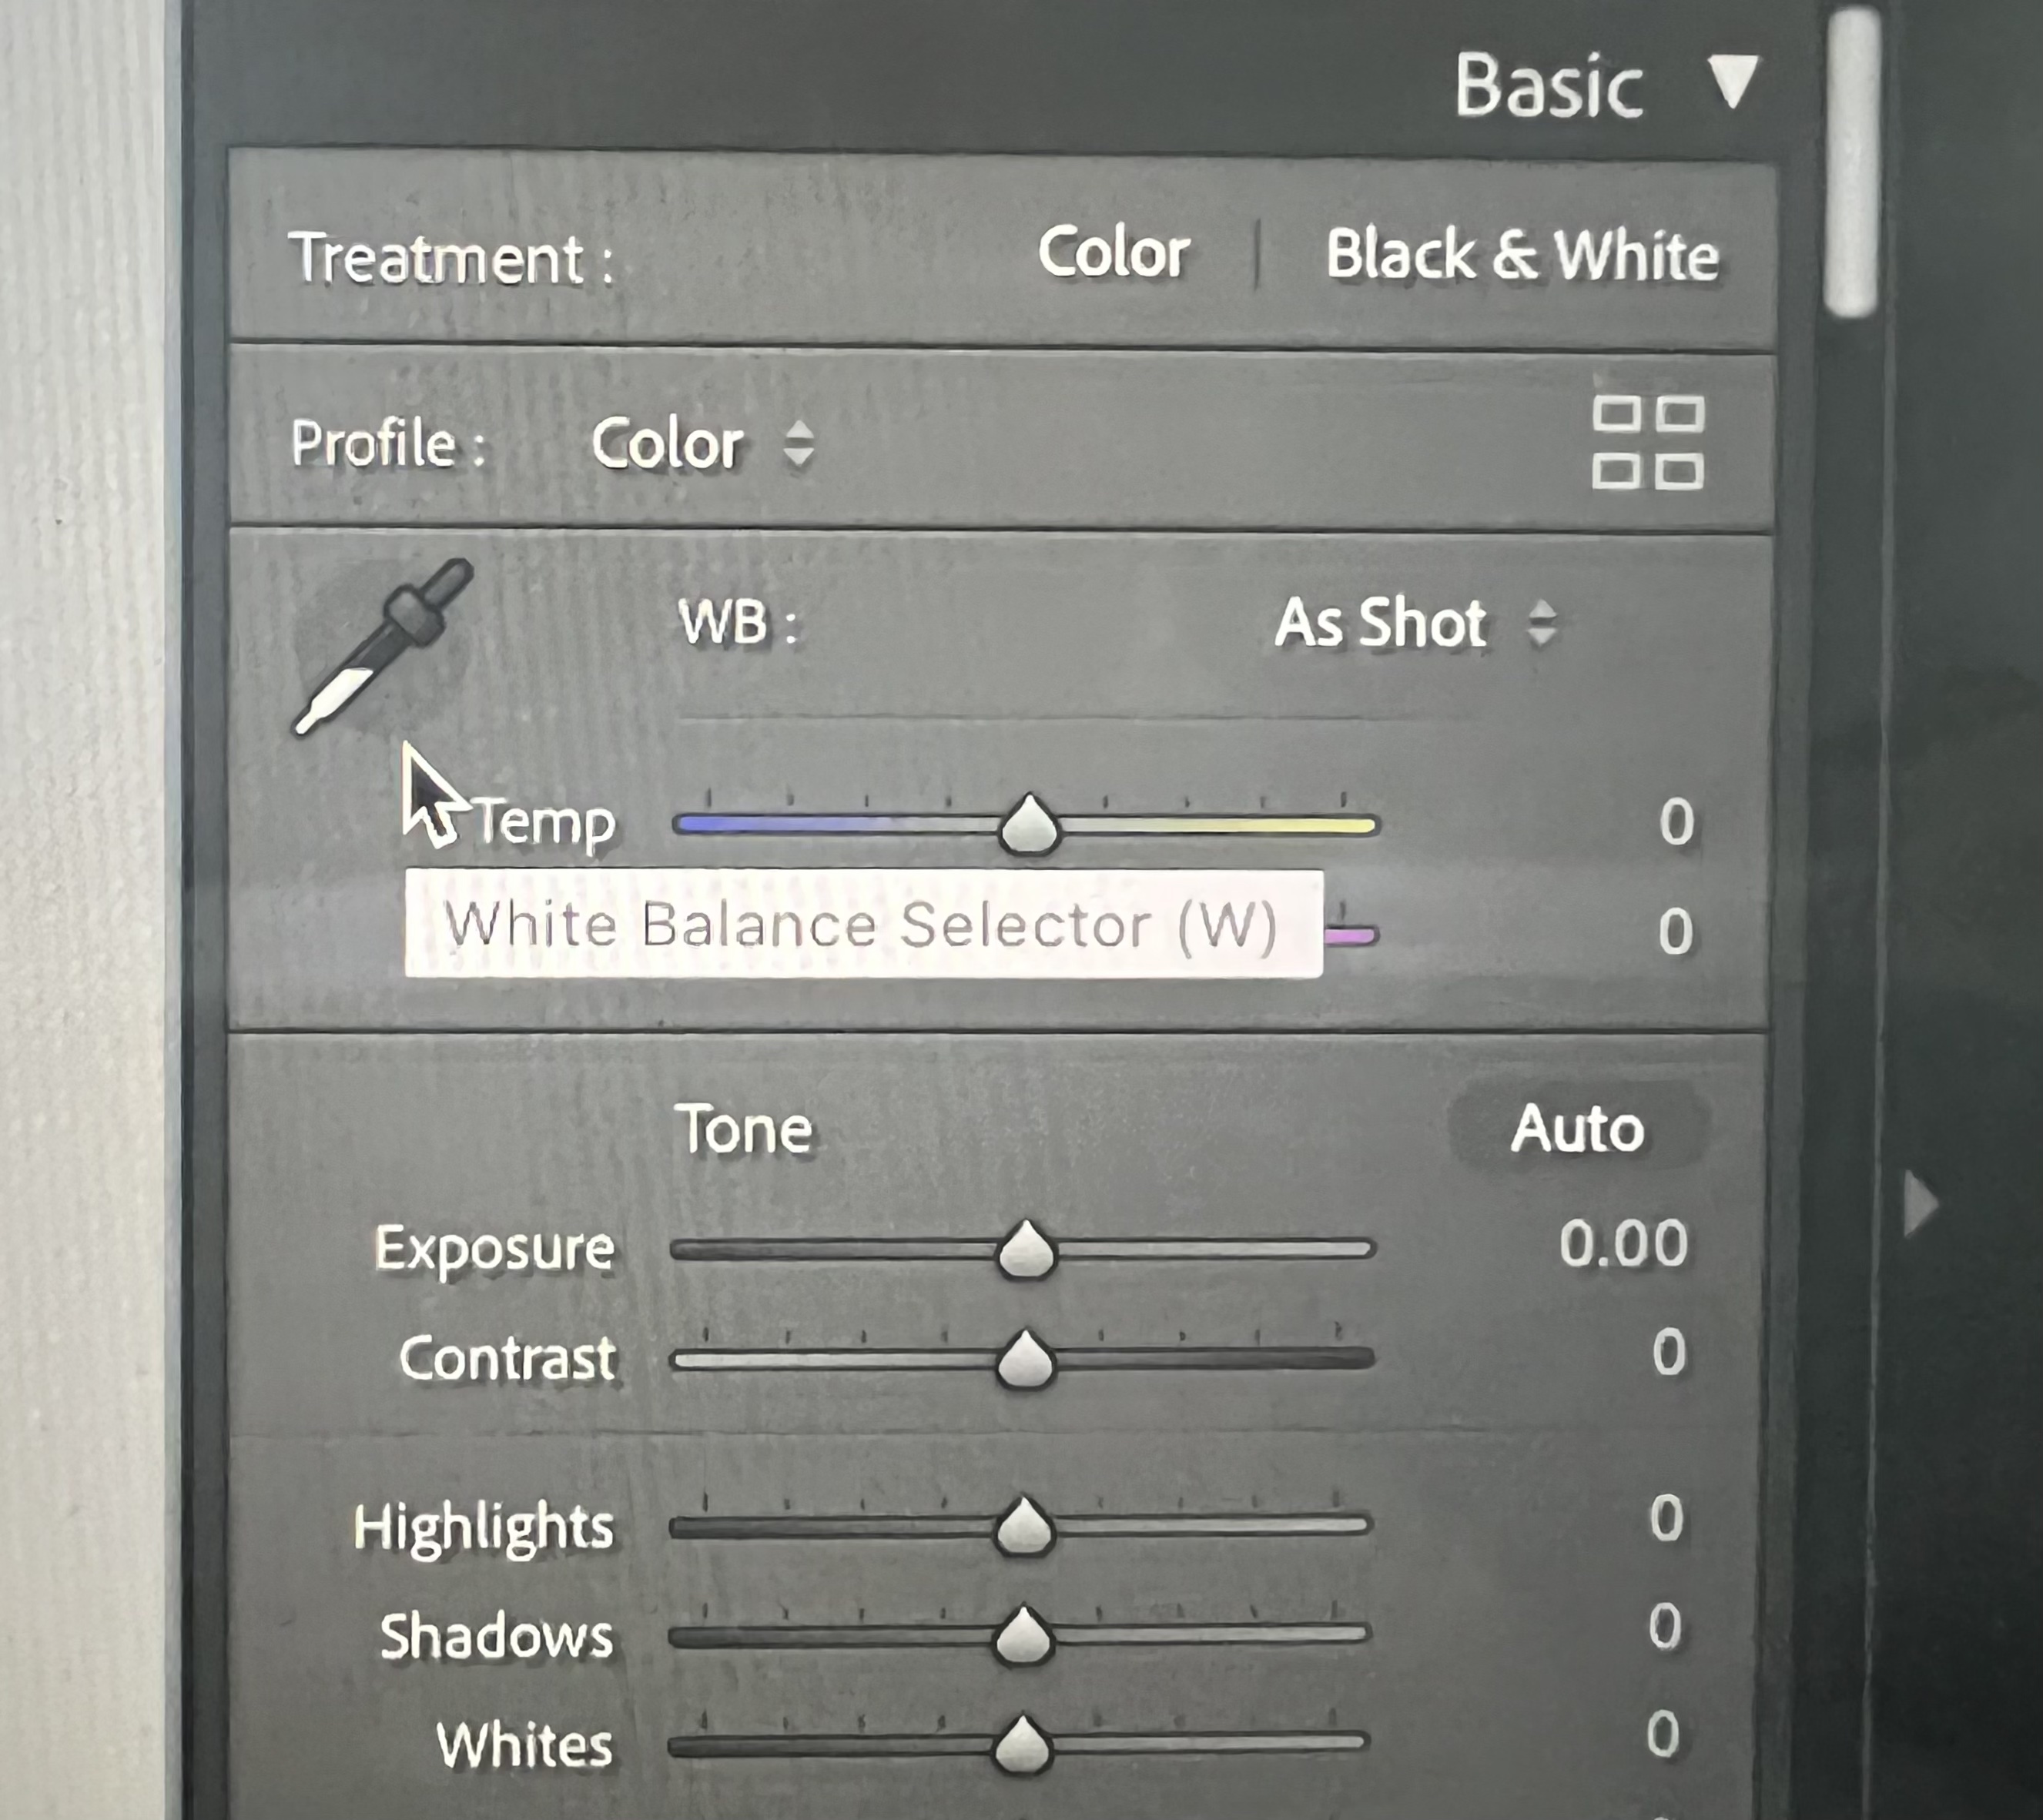
One helpful trick you can try to correct skin tones is to look at the RGB numbers. To do this, go to your Develop module in Lightroom, and click on the eyedropper in the White Balance section:
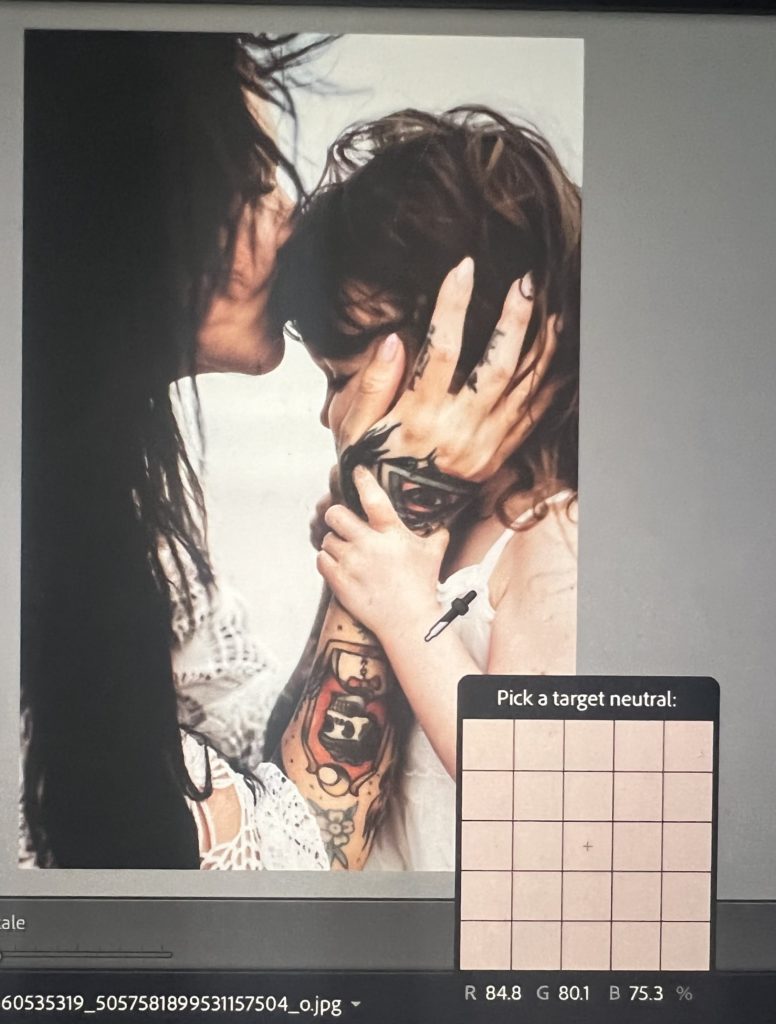
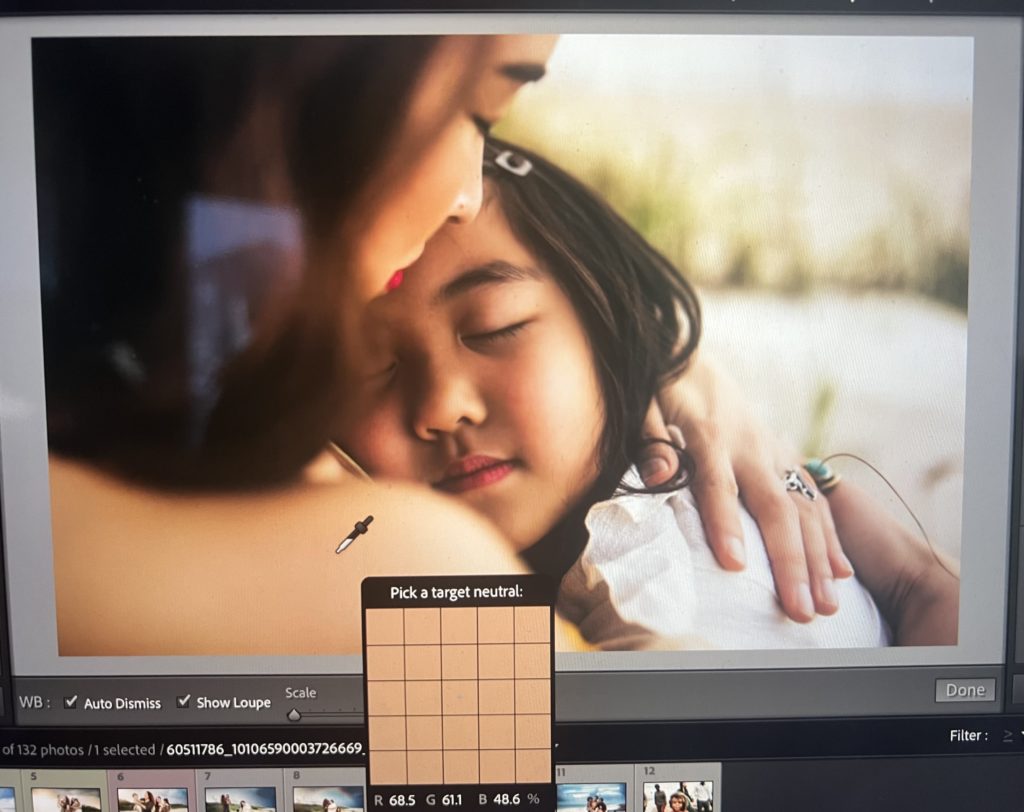
You’re looking for a 10-20 percentage spread between your R and B values, with G somewhere in the middle (this one is highly subjective – do you like your images more magenta? more green?). If you don’t have this spread and your numbers are very close to each other, they’ll look grey and muddy.
White balance is the first thing you should work on adjusting if you’re having trouble with skin tones.
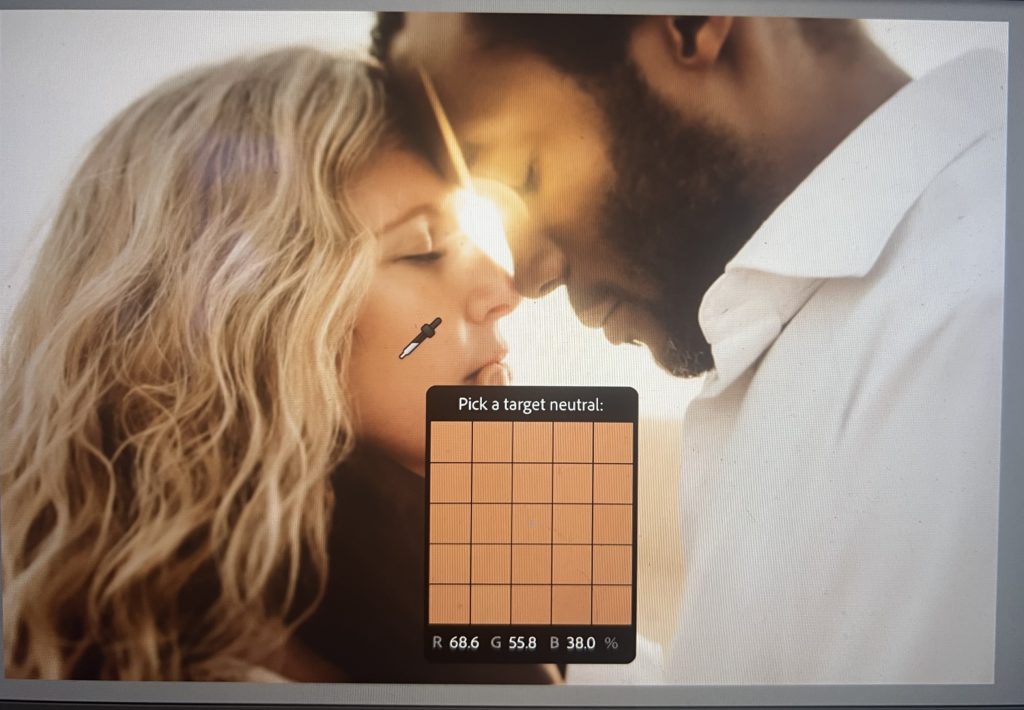
You can adjust your Temp and Tint while you’re hovering with the eyedropper by using your arrow keys. Up/Down adjusts Temp, and Right/Left adjusts Tint. Pick an image and go try it – watch how the numbers change.
Changing Exposure will also change the numbers – bringing up the exposure will bring up the values.
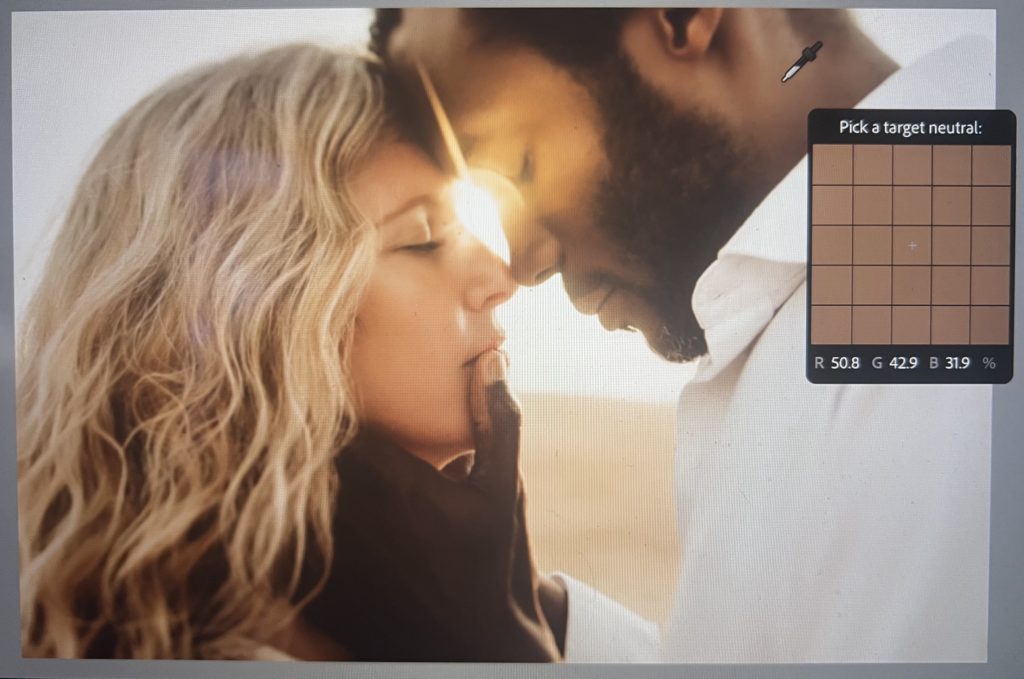
If you’re really having trouble, try making a gallery of images where you love the skin tones in them, and just checking out the values to see where yours are different – it can be really helpful to see that maybe you love skin tones where the G value is closer to the R, or maybe you love more contrast and your R and B values are way closer than the images you love. There is no science to editing, we just have to figure out what we each love, and work on getting closer!
My course Embracing the Storm; The Art of Editing opens for registration on November 18th, 2022 at 10am EST. It’s so full of tutorials, video walk throughs, worksheets, guides and so much more!


")

")
")
")
Follow along for more emotive family shoots, authentic connections and beautiful stories.
#emotionalstorytelling
comments +